How to Make a DIY Compost Tumbler from a Trash Can
Build a DIY compost tumbler from a trash can for a fraction of store prices. Faster compost, no pests, and just an afternoon of easy work.
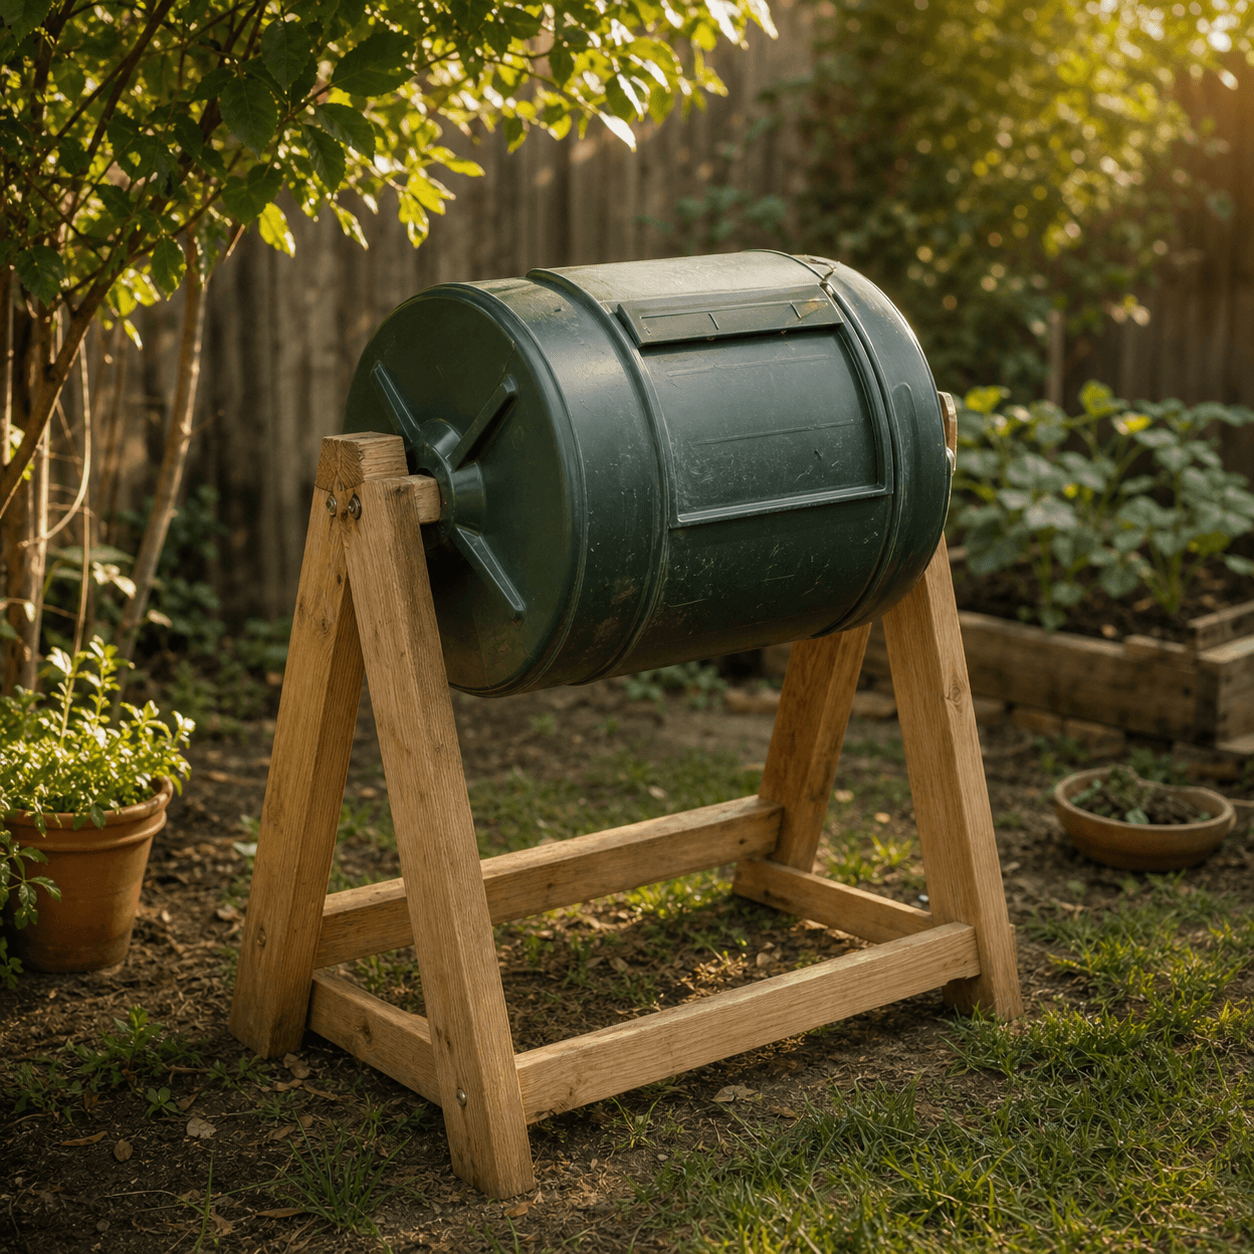
Commercial compost tumblers can run well over a hundred dollars for what amounts to a barrel on a stand. If that price has kept you from getting one, here's a satisfying weekend project: a DIY compost tumbler built from an ordinary trash can that does the same job for a fraction of the cost.
A tumbler's whole appeal is speed and cleanliness. Because you can spin or roll it to mix in air, compost breaks down faster than in a static pile, and the sealed body keeps pests out. Building one yourself is genuinely easy.
Why a Tumbler Beats a Pile for Some People
A traditional open pile is great, but it has drawbacks a tumbler neatly solves. Turning a pile with a fork is hard work, and an exposed heap can attract animals and take a long time to finish. A tumbler addresses all three:
- Easy aeration. Rolling or spinning replaces back-breaking forking.
- Pest resistance. A latched, enclosed can keeps out rodents and raccoons.
- Faster results. Frequent mixing means more oxygen, and more oxygen means quicker decomposition, often in a matter of weeks in warm weather.
The trade-off is capacity. A trash-can tumbler handles a household's kitchen scraps nicely but won't process a yard's worth of leaves. For most people, that's a fair deal.
What You'll Need
Gather these before you start:
- A plastic trash can with a tight-fitting lid, 20 to 32 gallons. A round can rolls; a rectangular one is better for a frame build.
- A power drill with a half-inch bit
- Two bungee cords
- Optional for the mounted version: a length of PVC or metal pipe for the axle, plus lumber and screws for a frame
That's the whole list. The basic version costs little more than the can itself.
The Simple Roll-On-the-Ground Version
This is the fastest build and needs no frame at all.
- Drill the air holes. Space half-inch holes every 4 to 6 inches all over the can, including the bottom and the lid. Aim for twenty to thirty holes. These let oxygen in and excess moisture drain out, which is essential for aerobic decomposition.
- Add your material. Fill the can no more than three-quarters full with a mix of greens and browns, roughly one part nitrogen-rich scraps to two or three parts dry carbon material.
- Add a splash of water. The contents should feel like a wrung-out sponge, damp but not dripping.
- Secure the lid. Stretch two bungee cords across the lid and hook them under the rim so nothing pops off when you roll it.
- Roll it every couple of days. Tip the can on its side and roll it a few feet across the yard, or stand it up and give it a vigorous shake. That's your turning done in thirty seconds.
The Upgraded Mounted Version
If you'd rather not chase a can around the lawn, mount it on a frame so it spins in place.
- Run an axle through the center. Drill a hole in the center of the lid and the center of the can's base, then slide a length of sturdy pipe straight through so it sticks out both ends.
- Build a simple A-frame or box stand from scrap lumber, tall enough that the can clears the ground when the pipe rests in notches or U-brackets on top of the frame.
- Rest the axle on the frame so the can hangs suspended and rotates freely.
- Spin it a few turns every couple of days. A quick handful of rotations tumbles everything inside and works in fresh air.
This version keeps the can off the ground, spares your back, and looks tidy enough to leave near the garden.
The magic ingredient in any tumbler isn't a special design, it's the turning. Every rotation folds fresh oxygen into the mix, and oxygen is what those hardworking decomposer microbes need to do their job quickly.
Getting Great Compost From It
A tumbler rewards a slightly different routine than a big pile. Because it's a closed batch system, it works best if you stop adding new material once it's about three-quarters full and let that batch finish rather than continuously topping it off. Start a second can or bag your scraps while the first cooks.
Keep these habits and you'll have finished compost fast:
- Balance your mix. Too many wet greens and it gets slimy; add shredded cardboard or dry leaves to fix it.
- Turn it often. Every one to three days is ideal.
- Watch the moisture. If liquid sloshes when you roll it, add browns. If it looks dusty and dry, sprinkle in water.
In warm weather, a well-managed trash-can tumbler can yield dark, crumbly compost in three to six weeks. Not bad for a repurposed can, a handful of bungee cords, and an afternoon of easy work.
Frequently Asked Questions
How many holes should I drill in a trash can compost tumbler?
Drill about twenty to thirty half-inch holes, spaced every 4 to 6 inches all over the can, including the bottom and the lid. The holes let oxygen in for aerobic decomposition and let excess moisture drain out. Skipping the bottom holes is the most common mistake and leads to a sour, waterlogged mess.
How often should you turn a compost tumbler?
Roll or spin the tumbler every one to three days for the best results. Each turn folds fresh oxygen into the mix, which is exactly what the decomposer microbes need to work quickly. This frequent, effortless aeration is why a tumbler often breaks material down faster than a static pile.
How long does it take to make compost in a trash can tumbler?
In warm weather, a well-managed trash-can tumbler can produce dark, crumbly compost in about three to six weeks. Speed depends on turning it often, keeping a good balance of greens and browns, and maintaining wrung-out-sponge moisture. Cooler weather will slow the process down.
Can you keep adding scraps to a compost tumbler?
It works best to stop adding new material once the can is about three-quarters full and let that batch finish, since a tumbler is a closed batch system. Continuously topping it off means you never get a fully finished batch. Start a second can or bag your scraps while the first one cooks.
Why is my compost tumbler slimy and wet?
A slimy tumbler usually has too many wet greens or not enough drainage. Mix in dry browns like shredded cardboard or dried leaves to soak up the excess moisture and restore airflow. Also check that the bottom of the can actually has drainage holes so liquid does not pool at the base.
James Carter
Composting & Soil Specialist
James is a lifelong allotment grower who's happiest with a fork in a compost heap. He covers composting, soil health, and closing the loop in the garden. More from James →